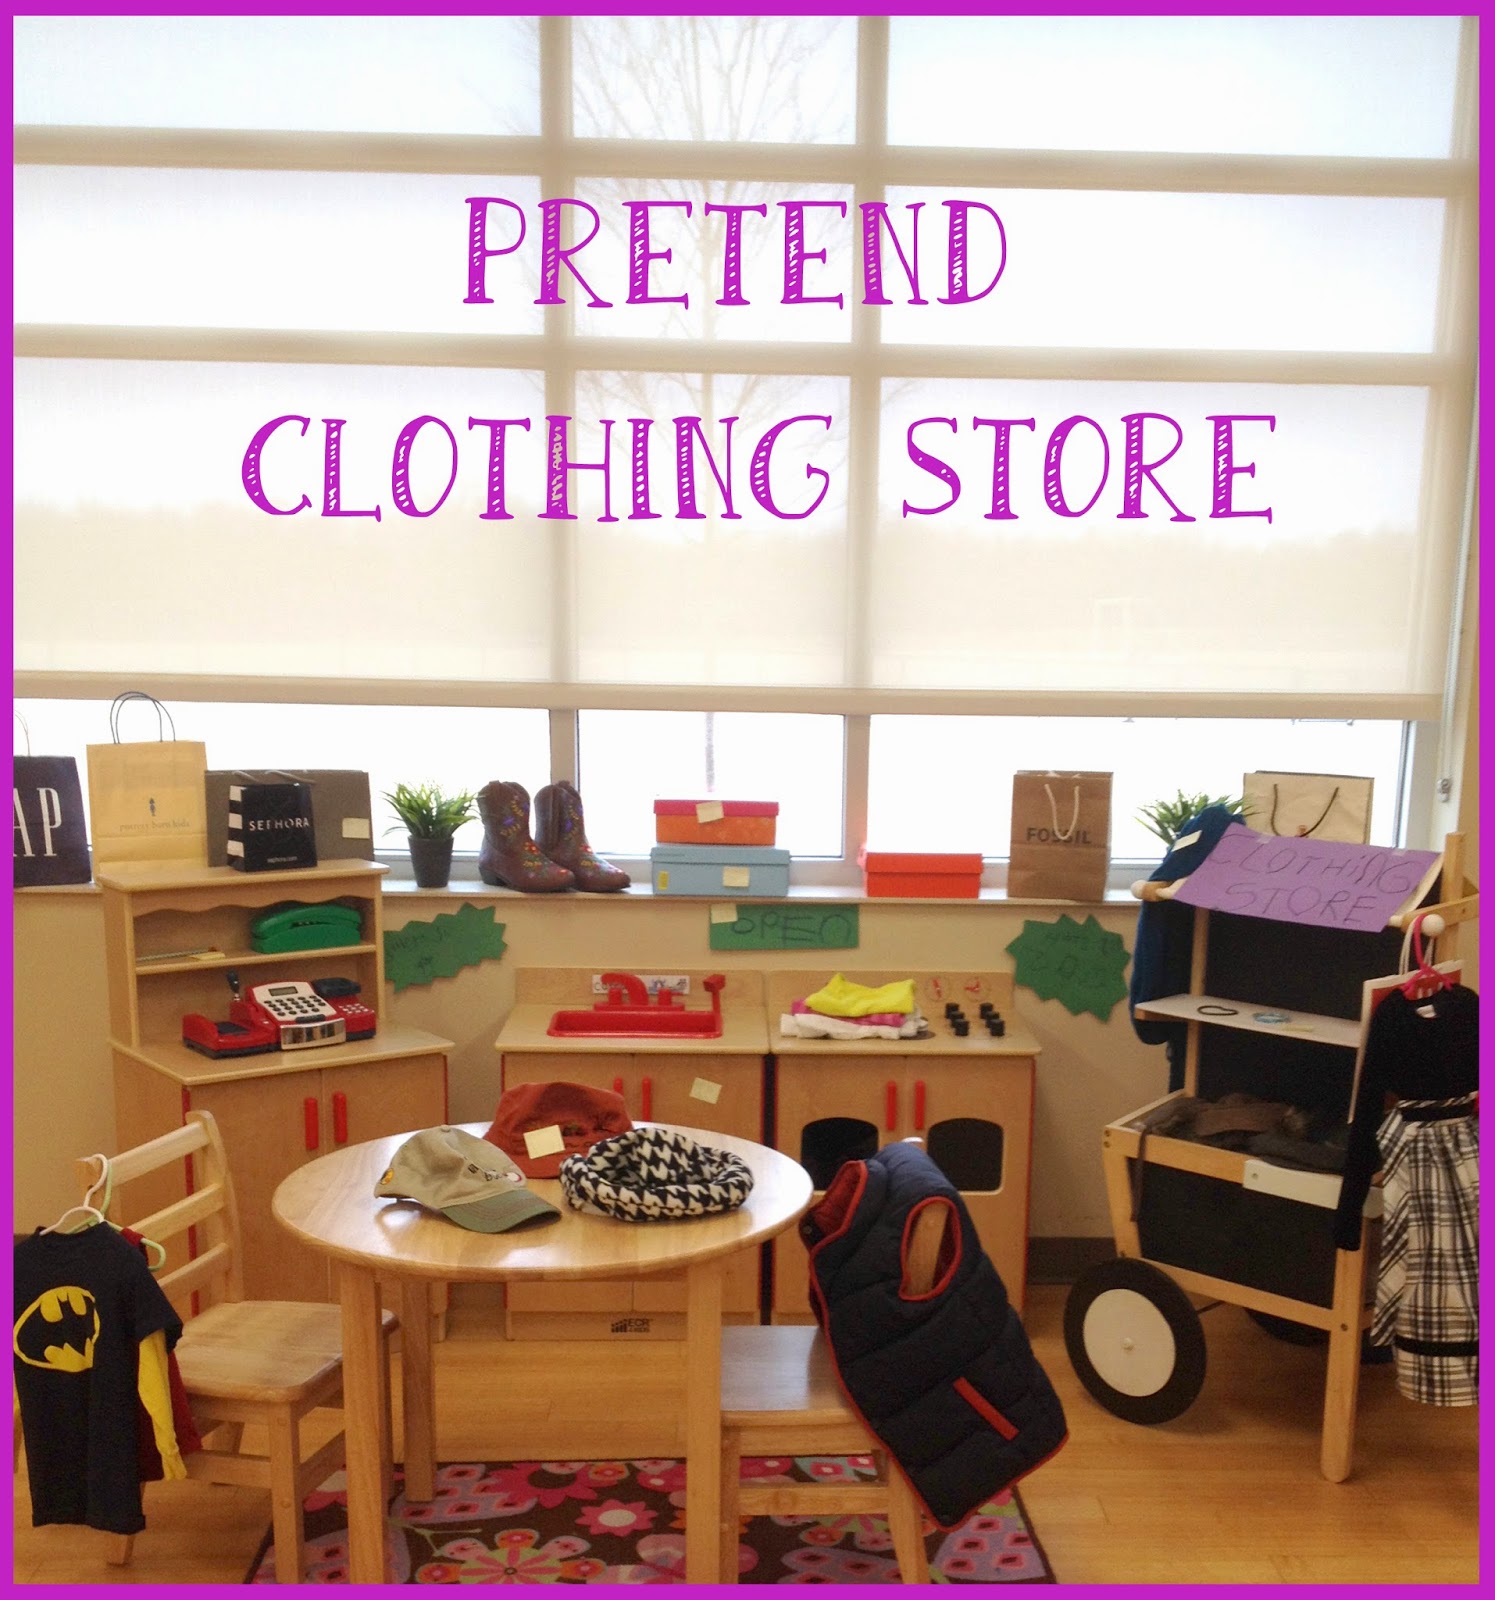
Last week I mentioned our clothing unit study. (Read about it here!) We have started to use Creative Curriculum studies to help guide students and introduce them to new learning experiences. I like how Creative Curriculum provides many ideas for hands on activities in all learning areas! The curriculum is project based and provides excellent motivation and questioning techniques that lead students into higher thinking learning. Through provocations, bringing in real items, questioning, and other activities, students were interested in setting up their own clothing store last week. This activity was student led and the students themselves actually came up with the list of items needed. I showed students a slideshow of familiar stores in our area and they were so excited to shout out the names (environmental print!!) and they also described what items came from the stores. We listed things we thought we needed for the clothing store and then watched a virtual tour/video of a real clothing store (since we cannot go on field trips) and added more to our list. I posted the list on our class Facebook page and parents were more than willing to help donate and let us borrow items for the week. It actually became a fun parent/child at home activity! Different groups of students did different things to help set up the store. Some students folded or hung clothes, some wrote out their own price stickers (post-its!), and some created their own signs!
Here's a photo of two of our students folding donated items and setting up shop! THEY decided the clothes needed to be folded and I let them have at it!
We recieved a wide variety of clothing items from party dresses and Batman shirts to furry hats and cowboy boots.
They decided our signs needed pictures (similar to our vocab. cards).
Neatly folded and labeled... it was all their idea! They loved role playing in their pretend clothing store! Here are some links below to some of the books we read to go along with this study. I always try to have a variety of types of books with each topic we study that include: fairy tales, familiar stories, familiar characters, rhyming, math, easy retell, and informational books.
For the past two weeks students have studied the topic of "clothing" during our discovery time. We have sorted clothing by patterns, sizes, seasons, and colors! We are reading "The Three Bears" which ties in nicely with size ordering and clothing. We have felt different textures and learned how some fabrics are made. Students participated in a yarn collage project. We have been using yarn in different ways and we now have a yarn art gallery up for display in our hall and in our classroom. Students made yarn collages this week. They practiced twisting and squeezing their own glue and cutting the yarn. They chose where and how to arrange their yarn ...and were able to use recycled gas station to-go cup lids! Students also made yarn block prints by wrapping yarn around wood blocks and then stamping it with paints. We have been learning so many new words like fabric, thread, stitch, sewing, crocheting, knitting, and quilting. Students are also in the process of making a real quilt. Our pre-k assistant has brought in her sewing machine to sew together or quilting squares! We are going to talk about the different parts of the sewing machine and their functions. We started out researching and asking questions about clothing which evolved into learning about fabric and what else fabric can be made into. The project originates from one of our school curricula called Creative Curriculum. Today we watched children in India practice the art of weaving and students made their own paper weave art!
Documenting student learning and creative thinking! It is not about the end result..it is about the process!
Our window gallery and Three Bears Kitchen!
Choosing colors for yarn block art!
Printing!
Student block prints and photo documentation in our hall gallery!
We asked students, as they were making their art, how they were making it.. did they have a plan? ..and what happens if..?
Our paper weaving project! Patterning and positional words!
Chang Naga kids sing a weaving song at Changdang village, Tuensang district, Nagaland.
We are studying artist, Dale Chihuly, who
blows glass into abstract 3D shapes! We viewed Chihuly’s art on our Smartboard
and watched a video clip of the stages of glass blowing. We discovered how the air and heat changes
the shape of the glass. We also learned that sand and
heat combine to create glass. We described what
Chihuly’s glass shapes looked like to us. Some of us thought the sculptures
looked like flowers, sea creatures, or even giant snakes!
We used the Chihuly app and our breath to
blow glass art on an iPhone. We compared the sizes of the “Macchia” and “Flori”
shapes. Chihuly’s use of bright colors
inspired us while creating our own “Macchias.” First, we colored coffee filters with markers.
Next, we used our fine motor muscles to squeeze and spray water on our art! We observed how the water caused the ink to
run and create new spontaneous designs and colors…similar
to Chihuly’s art! We placed our colorful filters on cups to dry. We used our
creative expression to place our Macchias together wherever we thought would
look best.
If you would like to learn more about
blown glass visit www.childrensmuseum.org/fireworks-of-glass or The Oklahoma
City Museum of Art, where a Chihuly glass art gallery is currently on display! Here is a video that shows how glass is blown into shapes!
Check out this free Chihuly iPhone app that allows you to blow into the microphone to create blown glass art!
Today we discussed heat and change (properties of matter!). Students were asked why and how does a popsicle, snow, ice cream, butter, cheese, ect. melt. We then experimented with crayon color combos and a crafting heat gun. I read somewhere that a heat gun would prove faster results than a hair dryer. It only took a few seconds for the crayons to start dripping. Students even unwrapped the old crayons that we used in our experiment (fine motor practice). Of course after we unwrapped the crayons, little bits of paper were everywhere. We wrapped a little tape around the students hands and called it a clean up game..and in no time the carpet was spotless! This is a fun activity that I would definitely do again! I would have used our big pumpkin but it decayyyyed! "Decay" is a popular word in our classroom lately. We watched a Sid the Science kid video and after that we've had decayed cheetos, celery, and even a decayed banana peel was found at home and brought to show! YUCK! : ) Happy fun friday!
#1 - Morning Meeting! A time to dance, sing, annnnd shake our sillies out! Our morning time also includes our pledges, school creed, calendar, and weather graphing.
#2 - Chevron! No matter how hard I try to have my classroom have the natural look..I can't shake the chevron! This happy little can sits right on our parent sign in station. PTA gave our class a donut party for collecting the most box tops! We were quite excited! : )
# 3 - Conscious Discipline! This is our "safe spot." Students can regulate their own emotions by doing breathing techniques and choosing calming activities.
#4 - Art! - A couple of teachers in my building started doing these group color canvases. We had to join in on the fun! Each student contributed one item to each canvas. They are so fun to look at and brighten my day!
#5 - This happy little hoot owl given to me by my AMAZING pre-k aide! I love owls and he just cheers me up!..and so does my aide..she makes me laugh all day long and the kids adore her! Thanks Mrs. B!
We used real pumpkins in whole group math to practice ordinal numbers. Students took turns placing the pumpkins in order. Then, a student was selected to take a pumpkin away and hide it as the other students closed their eyes. They took turns guessing which number/pumpkin was missing! Now the pumpkins have moved into our math center! Students can have hands-on practice with ordinal numbers or they can act out the story below.
There are a couple versions of "Five Little Pumpkins." I wrote this version to incorporate the pumpkin life cycle/production sequence.
These mini pumpkins and leaves were in the Target dollar aisle! I made the cards on photoshop.
This is an idea I found on pinterest. They are fall tactile number cards! Students had to carefully punch the dots/count 10 and punch out the dots on the numeral with a thumbtack. I know what you are thinking..20 four year olds with thumbtacks..SCARY! ..but amazingly they were so careful and focused (and quiet!) while they were punching dots with the tacks! Then they glued seed pods (beans) to their cards. This activity idea is from: http://thepreschooltoolboxblog.com/?p=1216
Here is a photo of our fall harvest pretend center..
I love having books, vocabulary, and writing in most of the centers! Fellow teachers that I worked with last year showed me how to incorporate literacy into practically any center!
Our discovery center!
In this center we have: color sensory bottles, rainbow observing with cd's/flashlights, rainbow light up wands, rain stick,magnets, ABC/number wood chips, tree slice, fall leaves, and colored feather sorting.
The teacher across the hall introduced me to "Sid the Science Kid" videos! She always does something fun in class to go along with the Sid experiment. She had her class do an experiment with decaying bread, clean/dirty apples, and part of a pumpkin. We tried the bread and the apples. For the bread, we had the students squirt the slices with water, place in ziploc baggie, and hang in the window. For the apple, we passed around a slice of apple and talked about germs on our hands. The clean untouched apple was placed straight into the mason jar. It took less than a week for us to notice the differences! And my oh my is it disgusting! I am amazed at this experiment! The kids love saying "decay." I had one little boy say at lunch, "I'm eating decayed cheeto today!" Science is my favorite part of the day! : )
We've had a pumpkin seed taste test and also some pumpkin investigations/observations! Did I mention I love fall?!!
We had tested a pumpkin in class to see if it would sink or float. Then we made boats out of tin foil, floated them, and then sank them with marbles. Students counted how many marbles sank their boat ..love it when science and math combine! Each student took home a mini pumpkin over the weekend with instructions to report back on how they sank their pumpkin (without using their hands!) I love how their ideas were their own. Some students wrote word for word how they did their experiment, some drew a picture, some parents even took pictures! A few ideas were to scoop it out and let it soak overnight, tape a hammer to it, tape legos to it, and tape a toy plane to it... (see if it flies instead of sinks! HA!) Check out another fall setup HERE!
Here's an update for ya! I moved into my new classroom in August days before school started. It is now October (!!!) and I finally have my classroom pretty much arranged/organized to how I want it. I have less shelves than last year and our school is going for a more natural look...so I am slowly weeding out my lime green/hot pink things and replacing them with neutral colors and baskets. My only problem now is, when I buy something, have to decide whether I want the new item for my classroom or my house. I love baskets and my house is decorated in neutral colors!
This is our sensory center. In my previous classroom I had a whole sensory tub/table. This year I don't have one for my classroom (we do have some for outside sand/water play)...so I found this shallow tub at Target and set it on a low table. (Works great!) Currently the tub is filled with oatmeal, fall scents, apples, pumpkins, shovels, measuring cups, farm animals, and plastic alphabet letters.
Above our sensory table is our pumpkin patch! For a math activity, students had to draw a large circle, cut it out, and practice measuring height/width with unifix cubes! They did AWESOME! I love all the variations of their pumpkin sizes!
Our ABC center!
In our ABC center we have: Alphabet books, magnadoodles, highway letters with matchbox cars, a magnet letter match game, upper/lower case letter matching popsicles, Handwriting Without Tears wood pieces, an Apple Pie letter match game, alphabet bead stringing..
Alphabet letter stringing: I have a ton of pipe cleaners and this is a great way to use them up! I change out the pipe cleaner colors with the seasons. The ABC beads are from a craft store. Students can practice spelling their name or words from vocab. cards!
...we also have a variety of writing utensils (including melted crayon hearts, pencils, colored pencils, skinny markers), paper, old keyboard, name cards, dry erase boards, stencils for story writing, mini mailbox, wikki stix, and mini alphabet board books!
Birthday bags..they are finally up! Some of my co-teachers have some adorable hanging birthday bags! We use these to sing the months of the year. I covered reg. brown gift bags with scrapbook paper from Hobby Lobby. The book of scrapbook paper included all these fun rustic chevron prints!
This collage art is not in our room..but just outside our door. We call them our "Fall Trees." Students chose what items and how many items to glue on..and where! See Fall Room Tour part 2 HERE! Also..check out another fall setup



.jpg)
.JPG)
.JPG)


.JPG)
.JPG)
.JPG)


.JPG)
.JPG)
.JPG)
.JPG)
.JPG)
.JPG)
.JPG)
.JPG)
.JPG)
.JPG)
.JPG)
.JPG)
.JPG)
.JPG)
.JPG)
.JPG)
.JPG)
.JPG)
.JPG)
.JPG)